What if…..#
Programming
30 min
1#
Now that we are able to read the values from the sensors, we can start using it and let the robot react to it. In this workshop you will learn about the basics of programming. You will program a robot that stops when it sees a line.
2#
The programming of the robot of course happens at the ‘Programming’ tab. In the previous workshop you have read the value of the sensor once.
This of course is something we want to do continuously. We can achieve this by using ‘loops’. You can add one of these around your existing blocks and press ‘play’.
TIP
In case you made a small mistake you can undo things by clicking the ‘undo’ button.

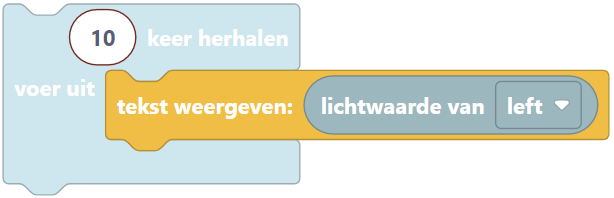
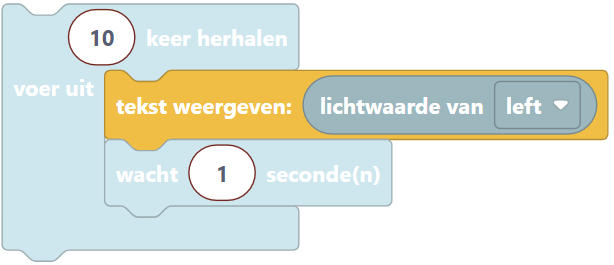
3#
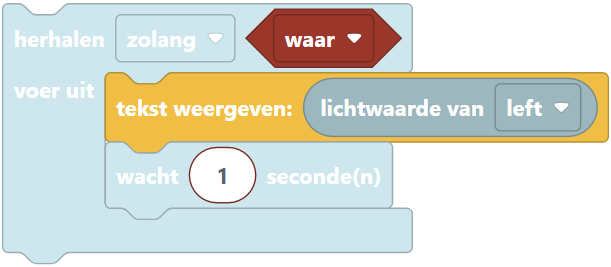
You will now see the value being printed 10 times. That of course was a bit too fast. To actually see what happens it helps to add a ‘wait’ block.
4#
But running this 10 times is of course not enough. It would be even more easy if the program would just start again after it is finished. This is what you can do with the ‘while true’ block. You can put this one around your code (and remove the repeat 10 one).
LET OP
In case you are reading sensor values inside the ‘while true’ block, you also have to add a ‘wait’ block. If you forget that one, your robot will try to read the values so quickly that it is not able to catch up. If you forget to add it, you will notice that your sensor values will not be up-to-date anymore and you will receive old values.
5#
This program will not stop by itself, since we told it to continue. You have to tell it to stop by clicking the ‘stop’ button.

6#
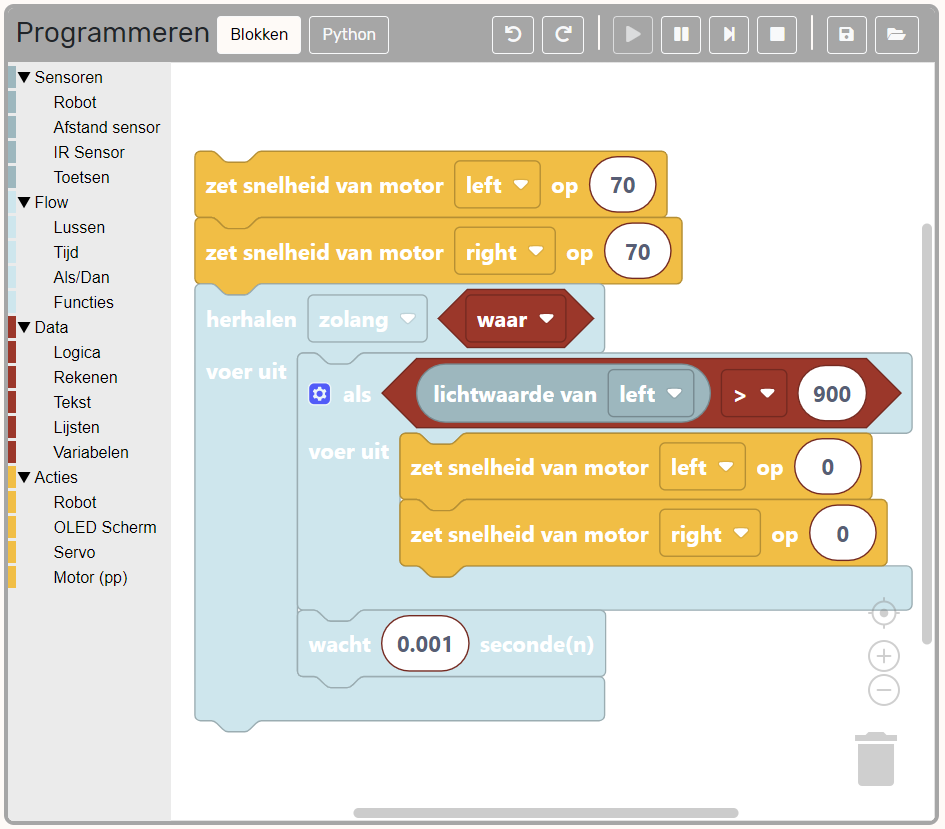
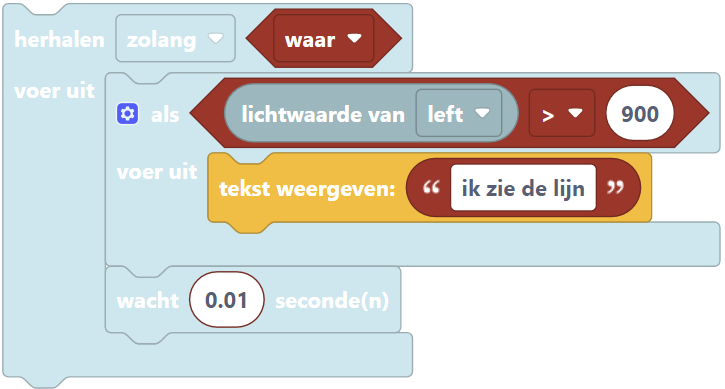
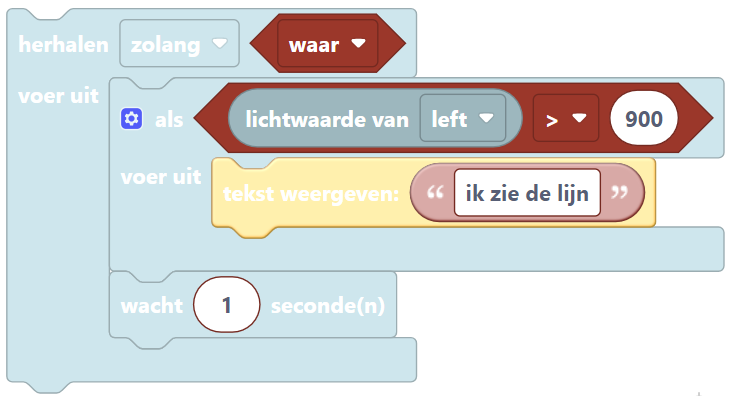
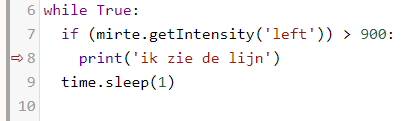
In order to make the robot stop at a black line, we need to add a ‘if-else’ blok. This block makes sure that the robot does something based on a certain condition.
This example code will detect if the robot sees a black line or not. You can move your robot over the black line and check if it indeed sees it.
BE CARFEUL
The values of whether it is black or not might be different. So you have to find this yourself.
TIP
In case you made a small error, and do not want to use the ‘undo’ button: you can also drag and drop the block to the bin.

7#
You will probably run into a situation every now and then where your program is not working the way you intended it to work.
In these cases it could be useful to pause your program and go through it step by step. This is called ‘debugging’. You can debug a Mirte program by clicking the ‘pause’ button:

Your program will stop and highlight the block where the code will continue.
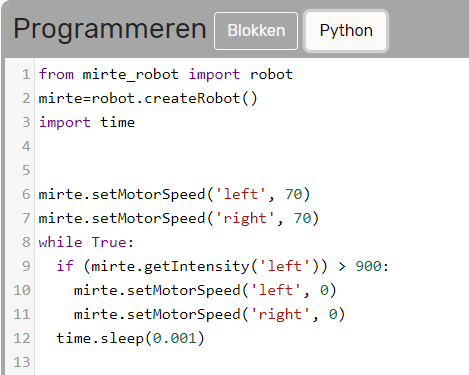
You will see a similar thing in Python, only not highlighted, but with a red arrow in front on the line. You can execute that line/block by pressing the ‘step’ button:

The robot will only execute that single line/block and pause again. In this way you can easily follow the steps your program is doing.
8#
Assignment: We can now let the robot drive until it sees a line. To do so we again need the motor blocks.
You can still play around with the values of the motors, the sleep value, and the value for which a line is detected.
Are you able to make the code even more compact?